
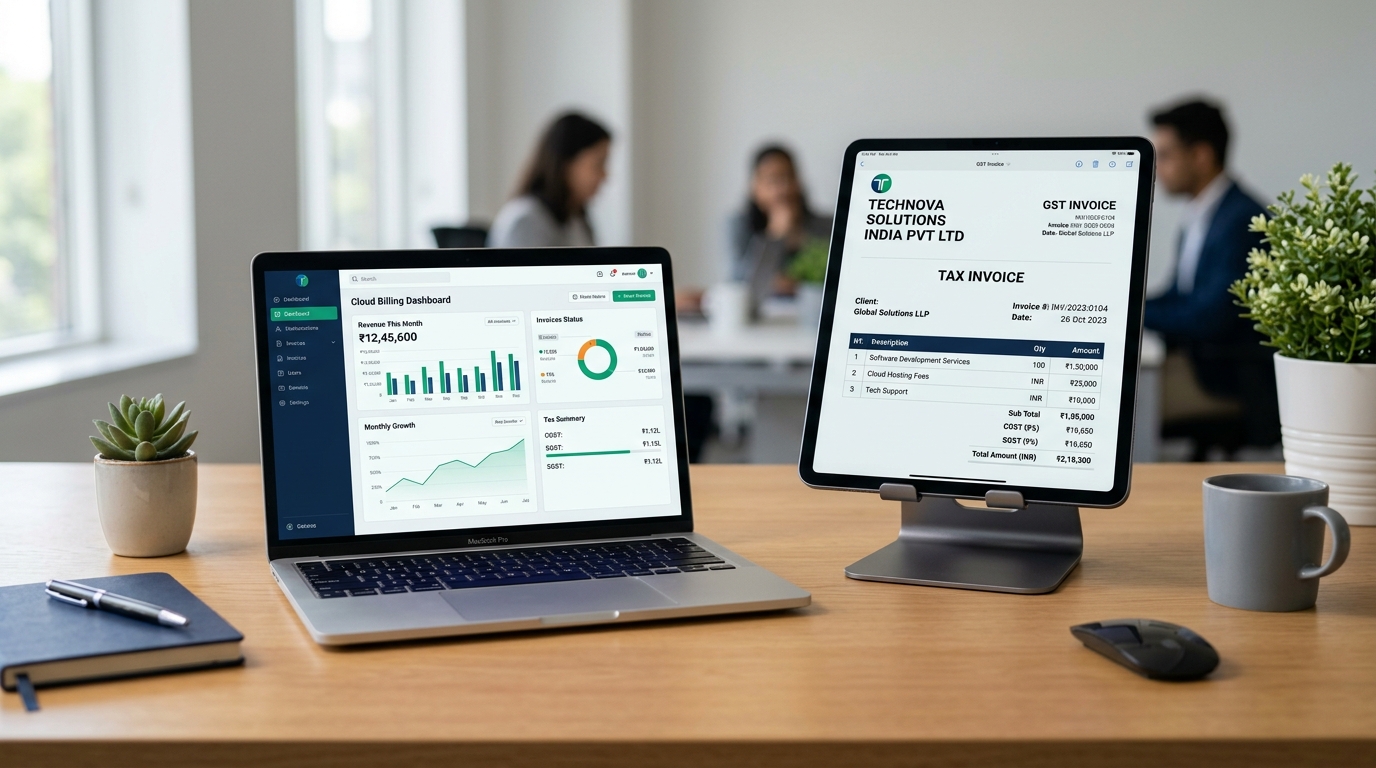
Creating and sending professional invoices is the lifeblood of every freelancer, consultant, agency, and small business owner. Yet, millions of independent creators and entrepreneurs in India still struggle with messy Microsoft Word documents, unformatted Excel spreadsheets, or expensive accounting subscriptions that charge between ₹3,000 to ₹10,000 annually just to remove watermarks.
To support the global small business ecosystem, Zoho made Zoho Invoice 100% permanently free. Unlike typical SaaS freemium models that lock essential features behind paywalls, Zoho Invoice has zero subscription tiers, zero invoice limits, zero client caps, and zero intrusive ads.
In this exhaustive, step-by-step guide, you will learn how to set up your free Zoho Invoice organization, configure Indian GST rules (CGST, SGST, IGST, and SAC/HSN codes), customize branded PDF templates with your company logo, and attach instant payment links so clients can pay you via UPI or bank transfer directly from the invoice.
In 2021, Zoho's CEO Sridhar Vembu officially announced that Zoho Invoice would transition from a paid SaaS product to a completely free offering forever to give back to the small business community. Zoho funds this through their enterprise CRM and ERP suites, meaning small businesses get enterprise-grade billing infrastructure at ₹0 cost.
1. Key Features You Get for Free
Before diving into the configuration steps, here is what Zoho Invoice provides without a single rupee of subscription fees:
- Unlimited Invoices & Estimates: Create as many client bills, quotations, and proforma invoices as you need.
- Automatic GST Calculation: Select your client's state, and the system automatically determines whether to apply IGST (inter-state) or split CGST + SGST (intra-state).
- Branded Customization: Add your high-resolution business logo, custom brand accent colors, signature stamps, and terms of service.
- Direct UPI & Bank Details: Print dynamic UPI QR codes and NEFT/IMPS bank coordinates directly on the PDF footer.
- Automated Payment Reminders: Schedule friendly automated email pings 3 days before or 7 days after an invoice becomes overdue.
- Multi-Platform Mobile Apps: Full-featured native apps on both Android and iOS with offline invoice drafting.
2. The 4-Step Invoicing Lifecycle
---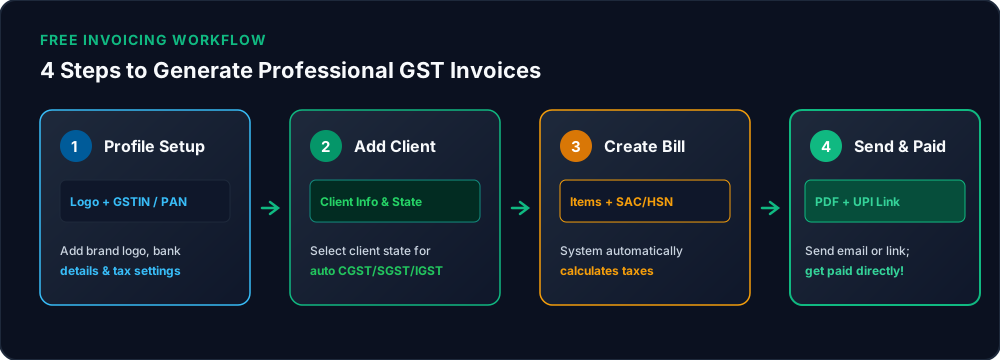
3. Step 1: Setting Up Your Organization Profile
Getting started takes under three minutes:
4. Step 2: Configuring Indian GST and Tax Settings
To ensure your invoices satisfy legal compliance under the Central Goods and Services Tax Act, configure your tax identity:
- In Zoho Invoice, click the gear icon (Settings) in the top-right corner → select Taxes → GST Settings.
- Toggle "Is your business registered for GST?" to Yes.
- Enter your 15-digit GSTIN (e.g.,
07AAAAA0000A1Z5). - Select your registered home state (this is vital because Zoho uses your state to calculate whether transactions are intra-state or inter-state).
- Non-GST Businesses: If your annual turnover is under the ₹20 Lakh (or ₹40 Lakh for goods) threshold and you are unregistered, select No and provide your PAN number instead. Your invoices will format as standard commercial bills without GST line items.
5. Step 3: Customizing Your Branded Invoice Template
Zoho Invoice comes preloaded with dozens of clean, publication-ready invoice designs:
- Navigate to Settings → Templates → Invoices.
- Choose a modern layout (the "Spreadsheet" or "Contemporary" templates look exceptionally sharp for freelancers and software agencies).
- Customize the primary accent color to match your brand palette.
- Under Footer Details, include your default bank transfer coordinates:
- Account Name: Your Business Name
- Account Number: XXXXXXXXXXXX
- Bank Name & Branch
- IFSC Code
- UPI ID / VPA: yourhandle@okaxis
- Add your standard Payment Terms (e.g., "Payment due within 15 days of invoice date. Thank you for your business!").
6. Step 4: Adding Customers and Client Records
Instead of typing client addresses repeatedly on every bill, create reusable customer profiles:
- Click on the Customers tab on the left navigation bar → click + New.
- Enter the primary contact name, company name, and billing email address.
- Enter the customer's Place of Supply (State) and their GSTIN (if they are a registered business).
- Click Save.
When you bill a client in the same state as your business (e.g., Uttar Pradesh to Uttar Pradesh), Zoho Invoice automatically splits tax into CGST (9%) + SGST (9%). When billing a client in another state (e.g., UP to Maharashtra), Zoho automatically applies IGST (18%). You never need to calculate tax fractions manually.
7. Step 5: Creating and Sending Your First Invoice
With your organization and customer profiles configured, generating a bill takes 60 seconds:
998314 for IT services), quantity, and agreed rate.
8. Collecting Payments via UPI and Online Gateways
Zoho Invoice makes collecting money effortless by providing multiple payment channels:
- Dynamic UPI QR Code: You can enable UPI QR codes on invoice PDFs. When your client receives the bill, they scan the QR code with PhonePe, Google Pay, or Paytm, and the exact invoice total transfers directly into your linked bank account with zero gateway commissions!
- Payment Gateway Integrations: If you wish to accept credit cards, debit cards, and net banking, Zoho Invoice connects seamlessly with leading payment processors such as Razorpay, Paytm, Cashfree, and Stripe. The invoice includes a "Pay Now" button, and when the transaction completes, Zoho Invoice automatically marks the invoice as PAID and generates a payment receipt for the client.
9. Comparison: Zoho Invoice vs. Paid Alternatives
| Feature | Zoho Invoice | Vyapar / Tally | QuickBooks / FreshBooks |
|---|---|---|---|
| Annual Price | ₹0 (100% Free Forever) | ₹2,500 – ₹5,000 / year | ₹4,500 – ₹12,000 / year |
| Invoice Limits | Unlimited | Limited on basic plans | Limited by client count |
| Watermarks / Branding | No watermarks | Watermark on trial | No watermarks |
| Cloud Synchronization | Real-time Cloud | Desktop-first / Manual backup | Cloud |
| Mobile App (Android/iOS) | Included Free | Paid add-on | Included |
| Client Portal | Included Free | Not available | Included |
10. Frequently Asked Questions
- Organization profile completed with logo and bank coordinates.
- GSTIN and home state configured for automatic tax calculation.
- Customer master records created with accurate billing details.
- SAC/HSN codes assigned to services and products.
- Professional invoice template customized with brand colors.
- Payment receipt automated upon fund clearance.