
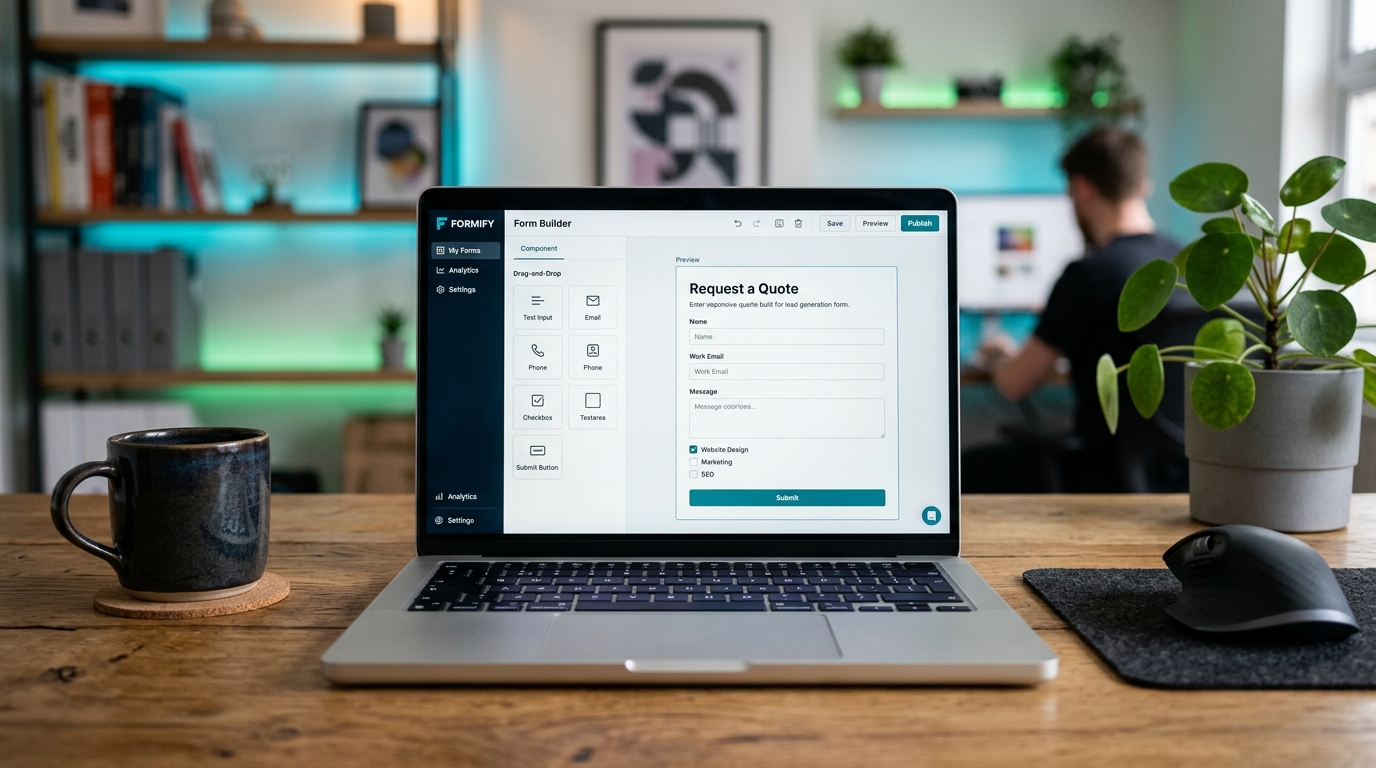
When you launch a personal website, freelance portfolio, or small business landing page, having a working contact form is non-negotiable. Visitors need a friction-free way to inquire about your services, request quotes, or ask questions without opening their desktop email client.
However, most beginner website owners quickly hit an annoying brick wall:
- Google Forms looks amateurish: It forces a purple header, displays a glaring "Powered by Google Forms" banner, and looks like a middle-school survey rather than a credible business website.
- WordPress plugins get hacked: Plugins like Contact Form 7 often fail to deliver emails without configuring complex SMTP mail servers, and free versions are relentless spambot magnets.
- Modern form SaaS tools are extortionate: Typeform charges $25 to $50 every month for a measly 100 responses, and Jotform cuts you off after 100 submissions unless you upgrade to an enterprise tier.
- Custom backend code takes days: Writing custom PHP scripts, Node.js endpoints, or AWS SES configurations requires server maintenance and vulnerability patches.
The cleanest solution I discovered after testing dozens of alternatives is Zoho Forms. Zoho offers an official "Forever Free Plan" that gives you 3 active forms, 500 monthly submissions, unlimited form fields, file uploads, automated email notifications, and instant copy-paste embedding for any website — completely free of charge with zero trial expiration.
In this exhaustive, verified tutorial, I will guide you step by step through creating a high-converting contact and lead form, setting up anti-spam honeypots, configuring instant email notifications, and embedding it seamlessly into your website using clean HTML or iframe code.
Under the official free plan, you receive 3 active forms, 500 submissions per month, and 200MB of file storage. For 95% of freelancers, agencies, and small service businesses, 500 inquiries a month is more than enough to handle your entire client pipeline without ever paying a single rupee.
1. The Complete Form Architecture
Before diving into the Zoho dashboard, let's look at how the data flows from your website visitor to your personal inbox without requiring any server-side coding on your hosting account:
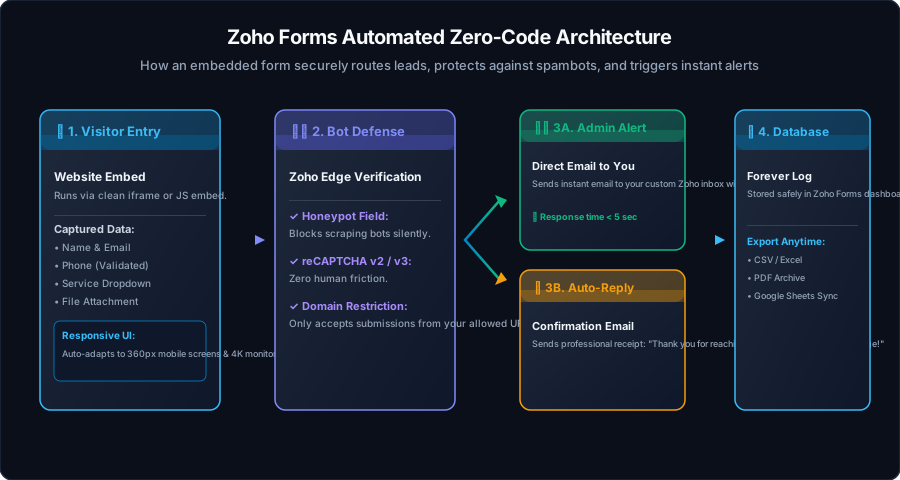
Notice that your web server never touches the form processing. The visitor fills out the fields, Zoho's high-speed cloud infrastructure validates the inputs and checks for spam bots, sends an immediate notification directly to your phone/email, and logs a permanent backup copy in your cloud database.
---2. Step 1: Create Your Free Zoho Forms Account
If you already created a free business email using our Zoho Mail Free Guide, you can log in with the exact same credentials because all Zoho products share a unified Single Sign-On (SSO).
Ensure you select your preferred regional data center (e.g., India zoho.in or Global zoho.com) based on your target audience.
3. Step 2: Build Your Form with the Drag-and-Drop Builder
Once you reach the Zoho Forms dashboard, click the large green New Form button. Select Blank Form so you have full control over the fields and layout.
Name your form Website Contact & Inquiry Form.
From the left-hand panel, drag and drop the following essential fields onto your canvas:
| Field Type | Label Name | Field Settings & Best Practices |
|---|---|---|
| Name | Full Name | Mark as Mandatory. In field properties, choose Single Line for cleaner mobile display rather than separate First/Last fields. |
| Work Email | Mark as Mandatory. Enable Email Verification/Format Check so typos like name@gmailcon are caught instantly. |
|
| Phone Number | Phone / WhatsApp Number | Mark as Optional. Enable international country code dropdown so overseas clients can input their full format without error. |
| Dropdown | What can we help you with? | Add options: Custom Development, Digital Consulting, Project Quote, General Feedback. |
| Multi-Line Text | Your Message / Project Details | Mark as Mandatory. Set minimum characters to 10 to discourage low-effort single-word submissions. |
| File Upload | Attach Brief or RFP (Optional) | Limit file extensions to .pdf, .doc, .docx, .png, .jpg and set max file size to 10MB to save your free storage. |
4. Step 3: Configure Advanced Spam Protection (Honeypot & Captcha)
The nightmare of every website owner is having their contact form scraped by automated Russian or Chinese botnets that blast 500 spam messages a day selling dubious pharmaceuticals or phishing links.
Zoho Forms provides enterprise-grade bot defense built right into the free plan:
A honeypot creates an invisible field that human visitors cannot see, but automated spambots automatically fill out. The second a submission arrives with text in that hidden field, Zoho silently trashes the submission before it ever reaches your inbox.
Invisible reCAPTCHA evaluates user behavior without forcing real human visitors to click on blurry fire hydrants or traffic lights.
5. Step 4: Configure Instant Email Alerts & Auto-Responders
To ensure leads never turn cold, you must configure two separate email notifications:
- Admin Alert: An immediate email ping sent directly to you with the client's message.
- Visitor Auto-Responder: A courteous, instant receipt sent to the visitor confirming their message was delivered.
1. Setting Up Your Admin Email Alert:
- Go to Settings → Email Notifications → Admin Notification.
- Under Send Email To, enter your verified custom business email (e.g.,
support@tyagihub.in). - Under Subject, enter:
🔥 New Lead from Website: ${Full Name} - ${What can we help you with?}. - Under Message Content, check Include Form Data (All Fields).
- Under Reply-To, select the form's Work Email field. This allows you to simply hit "Reply" in your email client to talk directly to the prospect!
2. Setting Up the Visitor Auto-Receipt:
- In the same tab, click Add Notification → Acknowledgment Email.
- Under Send Email To, select the visitor's Work Email field.
- Under Subject, enter:
Thank you for contacting TyagiHub! We received your inquiry. - Draft a warm, professional message:
"Hi ${Full Name}, thanks for reaching out. We have successfully received your inquiry regarding ${What can we help you with?}. Our team reviews submissions during standard business hours and will follow up with you within 24 hours."
6. Step 5: How to Embed the Form on Your Website
Once your form is designed and tested, navigate to the Share tab at the top of the Zoho Forms dashboard, then click Embed on the left sidebar.
Zoho offers several embedding methods. Here is how to pick the right one for your technology stack:
Method A: Standard Responsive iFrame (Universal & 100% Safe)
This works on literally every platform: plain HTML websites, Hugo/Jekyll static sites, WordPress, Webflow, Squarespace, and React apps.
<!-- Zoho Forms Clean Responsive Embed -->
<div style="width: 100%; max-width: 680px; margin: 0 auto; overflow: hidden;">
  <iframe
    src="https://forms.zohopublic.com/yourusername/form/WebsiteContactForm/formperma/YOUR_FORM_KEY"
    style="border: none; width: 100%; height: 650px; display: block;"
    title="Contact & Inquiry Form"
    loading="lazy">
  </iframe>
</div>An iframe creates an isolated sandbox. This guarantees that your website's CSS styles (fonts, button margins, resets) will never clash with or break the form fields, and Zoho's SSL security certificate remains 100% intact.
Method B: JavaScript Seamless Embed (Auto-Resizing Height)
If your form has conditional logic where extra questions appear dynamically based on user choices, the form height might expand. Zoho's JavaScript embed automatically recalculates the iframe height in real-time so your page never shows double scrollbars:
<div id="zf_div_container"></div>
<script type="text/javascript">
  (function() {
    try {
      var f = document.createElement("iframe");
      f.src = "https://forms.zohopublic.com/yourusername/form/WebsiteContactForm/formperma/YOUR_FORM_KEY?zf_rszfm=1";
      f.style.border = "none";
      f.style.height = "600px";
      f.style.width = "100%";
      f.style.transition = "all 0.5s ease";
      var d = document.getElementById("zf_div_container");
      d.appendChild(f);
      window.addEventListener('message', function(ev) {
        if (ev.data && ev.data.constructor === String && ev.data.indexOf('zf_rszfm=') >= 0) {
          f.style.height = ev.data.split('zf_rszfm=')[1] + 'px';
        }
      }, false);
    } catch (e) {}
  })();
</script>7. Styling Your Form to Match Your Brand Theme
By default, Zoho Forms comes with a neutral theme. You can customize the look and feel in two clicks so it blends seamlessly into your website's color palette:
- In the form builder, click the Themes tab in the top navigation.
- Click Customize Theme.
-
Background Color: Set to
Transparentso it inherits your website's exact background (whether light or dark mode). - Font Family: Select System Default or Inter / Roboto to match modern clean typography.
-
Button Color: Change the default green button to your brand's primary accent color (e.g., our primary blue
#005b99or#0284c7). -
Form Header: Toggle off the form header if your website already has its own
<h1>or<h2>title above the embed.
8. Managing, Exporting, and Syncing Leads
Every time a visitor hits submit, their entry is stored forever in your Zoho account. You never have to worry about missing an inquiry because an email server was down:
- All Entries Dashboard: Click the Entries tab in Zoho Forms to view, search, filter, and review all submissions.
- Instant Excel/CSV Export: Need to share leads with an accountant or team member? Click Export → CSV to download your entire database in one click.
- Native Google Sheets Integration: Under Integrations → Google Sheets, you can link a spreadsheet so every form submission automatically appends a new row to your Google Sheet in real-time — completely free!
9. Real-World Troubleshooting & Common Pitfalls
<div> has width: 100%; max-width: 680px; and your iframe has width: 100%;. Never give the iframe a fixed pixel width like width: 600px; because smaller smartphones (360px–412px wide) will be forced to display an ugly horizontal scrollbar.
notifications@zohoforms.com) while keeping your visitor's email in the Reply-To field. This prevents SPF/DMARC alignment rejections from strict mailbox providers.
https://tyagihub.in/thank-you/). Zoho will automatically redirect the user's browser the second their submission is verified.
Conclusion: Professional Web Forms with Zero Ongoing Overhead
Building a serious digital presence does not require paying $30 a month for basic form plugins or dealing with spam-riddled WordPress scripts.
By harnessing Zoho Forms' generous Forever Free tier, you get a 100% secure, spam-protected, mobile-responsive contact and lead engine running on your website in under twenty minutes. Combine this with your free custom domain email on Zoho Mail, and you have an enterprise-grade digital infrastructure without spending a single dime.